
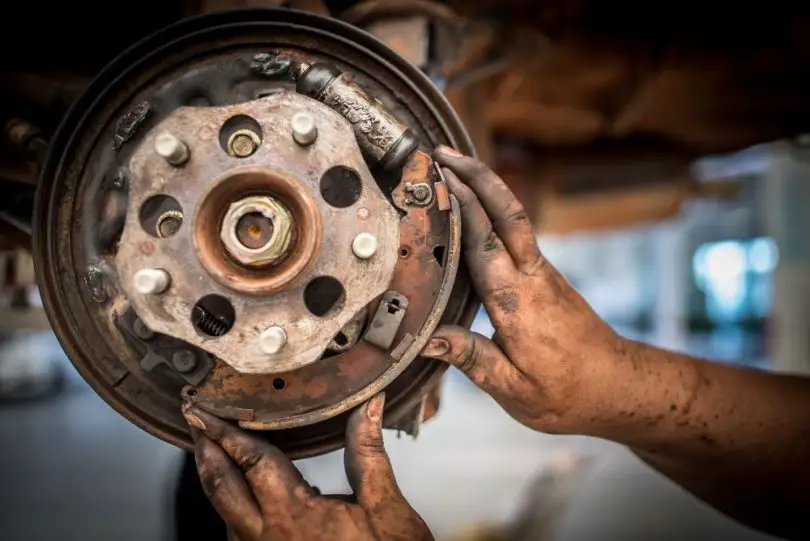
Pressing your brake pedal will cause fluid to flow through the brake lines, forcing your pistons to come out of the wheel cylinders. Your brake shoes will be pushing against the brake drums.
If everything is working properly, this will cause the vehicle to stop. The pedal will not feel right when the brake lines have any air in them. When you press down the pedal, you may feel a spongy sensation.
You can alleviate this by bleeding drum brakes properly. Here we show you how to do that.
Different Ways to Bleed Your Drum Brakes
1. Vacuum bleeding
The brake fluid is pulled into the bleeder valve by a vacuum pump.
2. Bleeding manually
A brake pedal is manually operated while the bleeder valve is opened and closed.
3. Reverse flow bleeding
An injector tool introduces air into the bleeding valve, brake systems, and out of fluid reservoirs.
4. Pressure bleeding
Forces air through the open brake bleeder with the help of a pressure bleeding tool.
5. Gravity bleeding
Gravity pulls brake fluid through the open bleeder valves.
Tools needed
- Brake fluid
- Wrench set
- Automotive jack
- Lug wrench
- Jack stands
- Plastic or glass jar
- Clear plastic tubing
- Vacuum pump
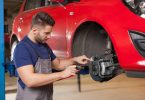
Manual bleeding drum brakes
Step 1: Safety first
First, jack up the vehicle on solid, level ground. The owner’s manual shows where four jack stands should be placed to jack it up.
Bleeding the brakes will see you under the car partially at different times, so the car must remain on solid ground.
Step 2: Remove the old fluid
The contaminated fluid should be removed from the master cylinder reservoir with an old hydrometer or a similar device. Dispose of the discarded brake fluid in an environmentally friendly manner by placing it in a container.
Step 3: Add new fluid
Add fresh fluid into the reservoir. Make sure the fluid you use is the right kind for your car.
Step 4: Work out which wheel to bleed first
Decide on the bleeding sequence. The best way to determine your vehicle’s bleeding sequence is to consult a repair manual or a database. You can follow the common rule of thumb.
Start with the wheel that is connected to the longest line. Most times, this is the one that is located furthest away from the master cylinder.
Step 5: Connect the plastic tube to each end
Put one end of the house into a container that has brake fluid in it.
Step 6: Step on the brakes
Apply light pressure to the brake pedal by having your assistant step on it.
Step 7: Open the first bleeder screw
The first bleeder screw in the sequence should be opened with a line wrench. The bleeder screw should not be removed.
Step 8: Push on the brake pedal
Let your assistant know the brake bleeder is open. They need to slowly depress the pedal. You should ask them to inform you as soon as the brake pedal approaches the floor.
Step 9: Allow fluid to run
The bleeder screw should drip fluid into the container. Watch to see if air bubbles are coming out of the clear hose.
Step 10: Close the brake bleeder valve and repeat
The bleeder should be closed when the fluid stops flowing.
Step 11: Release the pedal
The bleeder is closed, so let your assistant know. The brake pedal can now be released.
Step 12: Check our air bubbles
Once the air stops coming from the bleeder, repeat the procedure.
Step 13: Check the master cylinder level
During this procedure, frequently check the master cylinder fluid level. Air will be drawn back into the system if the master cylinder runs out of fluid.
Step 14: Put wheels on your vehicle
Put the wheels back on your vehicle the same way you took them off using a socket wrench. Tighten up the wheels nuts.
Step 15: Time to test the brakes
Following the bleeding of the system, check how your brake pedal feels. You want it to be firm. Otherwise, continue bleeding the brakes until the pedal feels satisfactory.
Vacuum bleeding drum brakes
Step 1: Safety first
Ensure the car is jacked up properly and on solid ground.
Step 2: Remove the old brake fluid
The contaminated fluid can be removed from the reservoir of the master cylinder using an old hydrometer or similar device. Dispose of the brake fluid in an environmentally friendly manner by placing it into a container.
Step 3: Add new brake fluid
In the clear reservoir, add fresh fluid if it’s less than the “full” mark. Ensure the fluid is the right kind for your vehicle.
Step 4: Remove your wheels
Jack up the car on solid ground and remove the wheels with the correct tools.
Step 5: Work out which wheel to bleed first
In this case, we should start with the wheel that has the longest brake line. It is the wheel closest to the master cylinder in most cases
Step 6: Hook up the vacuum pump
The vacuum pump hose should be connected to the first bleeder screw working with the sequence. Ensure that the screw’s nipple is snugly encapsulated by the hose.
Step 7: Open the bleeder valve
Using a line wrench, loosen the first bleeder screw (about 1/4 turn). Be careful not to remove the screw.
Step 8: Shut off the brake bleeder, then repeat the process
You should be able to observe the fluid flow through the tool’s hose once the bleeder pump is operating. Once you start seeing a drop in the air bubbles, you can shut off the bleeder screw. Then, repeat the bleeding procedure on the next corner of the vehicle until all four wheels have been covered.
Step 9: Fill the master cylinder
Make sure the reservoir of the master cylinder is fully topped off with clean fluid. Close the container immediately to prevent contamination and evaporation of the brake fluid.
Step 10: Put wheels on your vehicle
Put the wheels back on the car the same way you took them off safely and properly.
Step 11: Time to test the brakes
Make sure your car is working properly by taking it for a drive and testing it.
Gravity bleeding drum brakes
One person can easily bleed brakes using gravity.
Simply connect the hose to the bleed screw. Open it, and the old brake fluid and air will flow out.
This type of cheap Bleed-O-Matic setup works well. A small bottle can’t hold much brake fluid, but it prevents the reservoir from becoming drained accidentally. By using the magnet, you can keep the bottle visible.
Time dilation or abrupt changes in flow may be responsible, but often the bottle appears empty and then overflow. Pay attention to gravity.
Pressure bleeding drum brakes
One of the best brake bleeders is the pressure tank, brake bleeder. This is good for removing every last molecule of old brake fluid and air out.
First, test the connection between the tank and the master cylinder with air only, and depressurize. The tank is then filled with fluid, pressurized, and head around the car, cracking the screw with your wrench.
Most use round pressure caps. However, direct fitting adapters are possible.
Tips
- Later model vehicles require special bleed procedures called “Bleeding Sequences” because they use different valves and systems. If you attempt to bleed your brakes without the assistance of a professional, you may cause damage to your brake system.
- Always begin with the master cylinder that’s furthest away. Usually, you go with the back right and then back left. Next, go front right then front left.
- The removal of bleeding bolts can be challenging. Keep them from rounding off by using a box wrench that fits properly.
Warnings
- Your car’s paint will be ruined by brake fluid. Avoid spilling it.
- You should not attempt this alone, as the threads of the bleeding valve can suck air in. However, one person can perform bleeding with a pressure bleeder.
- You should always use the fluid recommended by your car’s manufacturer. Brake failure and/or expensive repairs can result from the use of the wrong fluid
FAQs
1. What is the recommended frequency of bleeding my brakes?
Ans. You should bleed your car brakes every 2 to 3 years.
2. When do I need to bleed my car brakes?
Ans. You might need to bleed your brake fluid. If you find the brake pedal in your car has become softer over time, or if your brakes feel less immediate or tight as they used to, your brake fluid may need bleeding. When brake fluid degrades, it loses its effectiveness and collects contaminants.


Leave a Comment