
Many think the distributor cap is not really that important to the inner workings of their cars. But they are an essential part of the ignition system that regulates the firing order of the engine.
A dirty or damaged distributor cap can cause a number of issues, from stalling to rough idling to the engine not starting at all in the worst-case scenario.
Here’s our DIY guide on how to clean your distributor cap the most effective way for longer-lasting results than usual!
How to Clean Distributor Cap?
Things you’ll need
- Sharp screwdriver
- Sandpapers
- Anti-corrosion formula
- Blower or drier
- Contact cleaner
- Scotch Brite
- Dremel
- Brasso
- VoltMeter
- MultiMeter
- WD-40
Step 1: Unplug & Uncap
Before you do anything electrical, remove the negative terminal from your battery.
Mark the spark plugs and cables so you can easily get them back later.
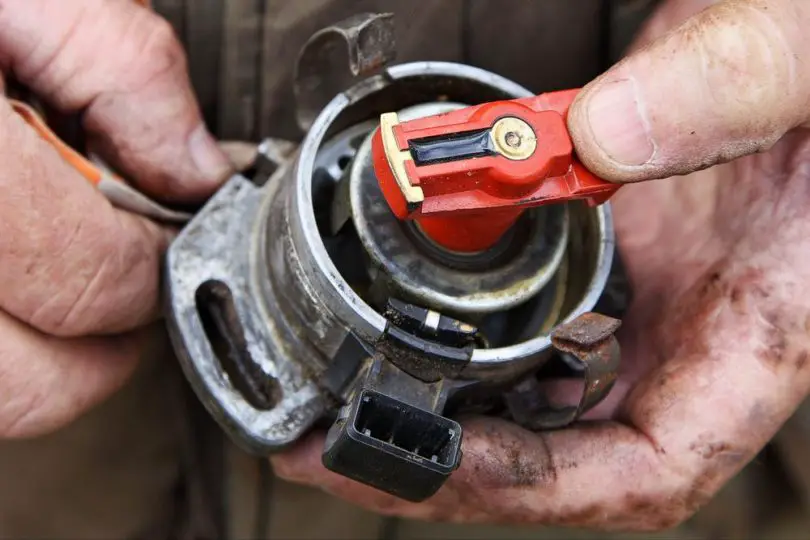
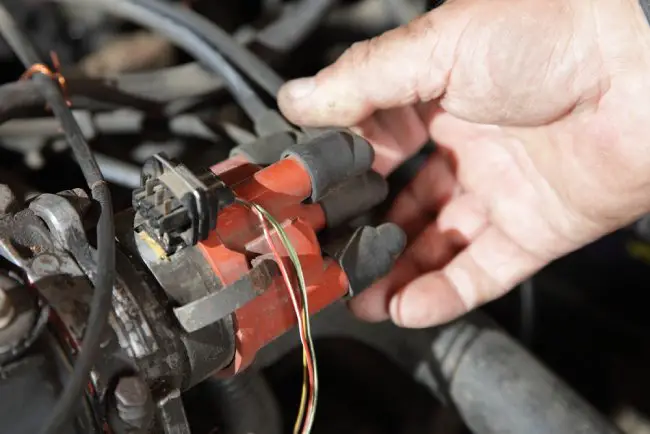
Gently pull out plug wires from the distributor cap and carefully unscrew to get the cap out in hands.
Step 2: Clean the terminals
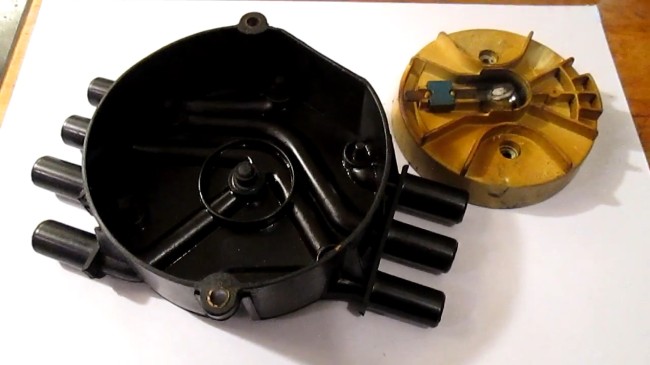
After you have the cap removed, you’ll notice the corroded contact points; and tips inside are probably covered in deposits. The end of the rotor should also be cleaned thoroughly.
You need a flat-tipped screwdriver and sandpapers to scrape them off. These carbon build-ups and oxidations may damage the contacts of your distributor.
Step 3: Spray wash the internal contacts
Apply the anti-corrosion formula on the internal contact points of the distributor cap. Let the points absorb the formula for a while.
Step 4: Dry out the cap
Dry up your distribution cap with a blower or a drier for fast action. Even a clean piece of the rug will work fine.
Step 5: Reassemble the cap
When all the tips and contact points are cleaned and dried, put all of them back in place just as they were before.
Why Corrosion Happens in Distributor Caps
The tips inside the cap may get corroded over time because of technical malfunctioning and chemical reactions.
1. Moisture
The water steam and moisture in the crankcase eventually cause the distributor shaft to go upwards and are trapped inside the distributor cap.
Once your car cools off, the amount of moisture reduces and reacts with the metallic contact points.
2. Overcharged batteries
Your battery may get overcharged by the alternator and produce acid. The acid reacts with the metal and transforms into powders on the terminals inside the cap; which may cause corrosion.
3. Wire issues
At times, it’s just a wire problem. Some wires are absorbent in nature and they entice water into the cap that may lead to corrosion.
As a precautionary step, get rid of the loose distributor cap gasket and replace it with a new one. Clean your distributor cap with WD-40 if you already have a tight one.
The Best Way to Clean the Inside of a Distributor
We recommend that you remove the distributor cap from the plugs and cables and give it a nice bath in the solvent.
Put the distributor in a vice before pulling aside the spark plugs and wires.
Many think this is the best way to clean distributor caps although this seems like a hard task for beginners.
How to Remove Moisture in a Distributor Cap?
When you notice your cap getting moist and vapored, it needs either maintenance or replacement.
First, remember the wires and where they were so you know how to put them together again.
Unscrew and open up the cap and clean inside with a rug or wiper. Scrape off the powdery stuff from the contact points with the screwdriver.
Apply anti-corrosion formula and contact cleaner on the tips inside. Dry the cap with a blower or simply wipe it off.
When clean and dry, reassemble your distributor cap back and go start the car to check how it runs.
Get professional help if you’re still having problems.
Things to Know When Cleaning Your Distributor Cap
- The rotor and the distributor points of your car grow an insulating layer over time that obstructs good spark.
- Dissolve the coating without damaging the brass. A sharp screwdriver will help you knock off the powder crust on the cap contacts.
- Be gentle to the rotor blade as you clean it with Scotch Brite.
- You shouldn’t sand the center spring on the rotor as this could wear down the carbon contact in the cap.
- Carefully wipe it down with a little MEK on a paper towel.
- If you would like to go technical, use a Dremel at low speed with a buffing wheel and dip it in Brasso.
How to Test a Distributor Pick Up?
There is more than one way you can perform the test of a distributor pickup. The common ones being –
1. With VoltMeter
Connect your voltmeter to the leads that go to the magnetic pickup. Put your voltmeter on a fairly high resistance setting in the thousands ohm.
Spin the distributor and look for numbers on the screen to jump around. Notice where the needle stops in case of using an analog meter.
You can do this on the car and use the starter motor to spin the distributor without turning it off.
2. With MultiMeter
Connect the negative terminal of the pickup coil to the negative lead of the multimeter and do the same with the positive terminals. Set the multimeter to measure resistance.
But a multimeter only measures the “unloaded” battery capacity. It doesn’t tell you much about whether your battery needs a replacement.
3. An Old-School way
You don’t need a meter this time. The test will be done by the spark itself, one coil at a time. Unplug your coil and place it close to the engine housing, then crank the engine.
Notice the end of the coil that’s supposed to knot with the spark plug. If the spark comes out hitting the engine cover, your coil is working fine.
This method works better with older models.
How to Single Out a Damaged Distributor Cap?
The signs of a bad distributor cap are many. As it plays a vital role in a vehicle’s mechanism, your car cannot smoothly run with the fault in its distributor cap.
1. Starting issue
Cars with bad distributor caps often don’t start. In low temperatures, the cap may get frozen and crack when it hits up suddenly.
2. Stalling and Backfire
Your car will give you an uneven experience as you glide. You’ll hear loud backfires coming from the exhaust.
This indicates you have a broken distributor cap or the rotor has failed to distribute enough voltages to the spark plugs.
3. The shaking issue
Tremblings and shakings will not leave you alone until you get rid of your damaged distributor cap or the bad rotor because the cylinder cannot rightly strike its power through them.
FAQs
1. Can I use WD40 to clean my distributor cap?
Ans. Of course, you can use WD40 since it helps remove rust and moisture and acts as a lubricant.


Leave a Comment