
If your car has cloudy, foggy, yellow, faded, or oxidized headlights, it’s more than just an aesthetic issue.
Your safety is in question here. Limited visibility is known to be one of the major factors in more than 5.25 million accidents every year in the US.
We’re here to show you how to remove clear coat from headlights the most effective way!
Why Do Headlights Turn Yellow?
Car headlights are mainly made of plastic. With time and use, plastic lenses tend to become foggy, cloudy, and yellowish.
Several factors are playing a role here. Small dents from debris, dirt, chemicals, water vapor, and being exposed to the UV light may cause the polycarbonate lens to wear out and make them foggy.
When Should I Remove the Clear Coating?
When you feel any issues with the visibility using your headlight and your headlight looks a bit dull and foggy, that is the perfect time to remove and reapply the clear coating.
The time will depend on how much you use your headlights, how bad the road condition is, and how much shed you get during the day. Heavy users should remove the coating each season.
Remember, severely impaired or yellowed headlights can get you a ticket for up to $250 alongside a license suspension within the US.
How to Remove Clear Coat From Headlights – Step by Step
Things you’ll need
- Tape
- Plastic-lens cleaner/polish
- Soap water solution and sprayer
- Sanding machine/Polisher (If possible)
- Carnauba wax/Luquid wax
- Cotton cloth/Microfiber towels
- 400/600/1500-grit sanding disk/paper
- 2000-grit sanding disk/paper (if necessary)
- 3000-grit polish disk/paper
- UV coating solution
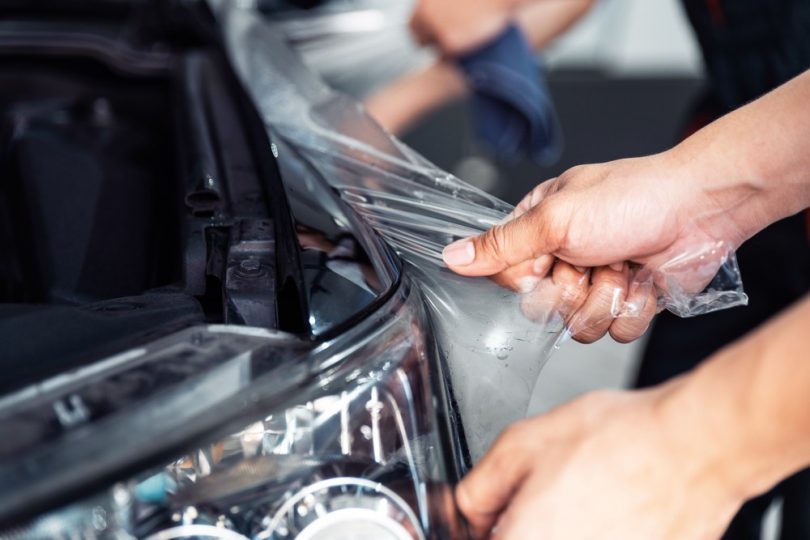
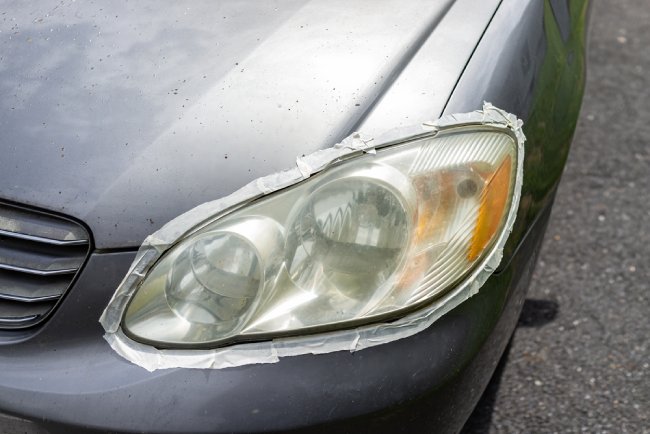
Step 1: Apply Tape
Apply tapes around the headlight so a sudden/wrong stroke doesn’t actually damage the car’s polish anywhere else. You can also remove the headlight from the car for additional security.
If you are taping, make sure to protect the surroundings well. Painters tape works great here.
Step 2: Wash
The process starts with washing your headlights with water thoroughly. This will clear the layer of dirt and chemicals off the lights.
Use a little bit of soap and a piece of sponge to get better results. Don’t forget to let it dry completely before moving on with the next steps.
Step 3: Sand the clear coat off
To reapply the clear coat, we’ll need to get rid of the previous layer first. It’s time to use sand disks/papers to get rid of the previous layer of coating.
You can use a 600/800-grit sand disk or paper depending on what kind of result you are expecting. The more grit number a sandisk/paper has, the finer the grinding will be.
The process will be wet-sanding. Keep a spray bottle filled with mild soap water solution and try to keep the work area as wet as possible. Don’t forget the edges.
Step 4: Cleanup
We need to clear all the sanding dust to move on with the next steps. Use the soap water solution and a piece of cotton cloth/microfiber towel to wipe off all the debris after the 1st sanding.
Keep sanding the headlight down till there are no clear spots left on the light. The light should look uniformly foggy and dull all over. You can sand again if you see some clear spots left.
Step 5: 1000-grit sand disk/paper
Wet the headlight down with soap water solution and attach a 1000-grit sandpaper/disk to your sanding block/machine. Keep the plastic wet and rub the light back and forth, all over it.
This will clear all the left clear coats and polish your light. Sand the headlight for 5-10 minutes to get the best result.
Step 6: 2000-grit sand disk/paper
A 2000-grit will smooth out the plastic lens completely and prepare it for polishing. Use plenty of soap water solution and don’t leave any spots behind. 5-10 minutes of sanding is enough.
The surface of the light should feel very smooth and look completely cloudy after you are finished.
Step 7: 3000-grit polishing disk/paper
This is the last stage of sanding. Use a lot of soap water to wet the surface and use a 3000-grit polishing disk/paper to rub back and forth all over the headlight.
Unlike previously used sand disks, a 3000-grit polishing disk/paper will start making the headlight clear again. You can stop sanding once you can see through the light entirely.
Step 8: Apply Lens Polish
Take a soft, cotton cloth and soak it in liquid lens polish. Now rub the cloth onto the lens’s surface in circular motion. Cover the lens entirely with a coat of lens polish.
You can also reapply a clear coat of your choice to get a clear and smooth finish. Don’t forget to cover the surrounding areas well before applying the top coat.
Step 9: Buff the polish off
If you feel the polish is not distributed thoroughly, take a clean microfiber towel and buff off the polish till you are happy with what you see.
If you reapply the clear coat, we recommend waiting for 1-3 days before doing anything further. The clear coating needs some time to cure. Use multiple layers if necessary.
Step 10: Apply Wax
Once the clear coat is cured, we have to provide additional security with carnauba wax/liquid wax. This will provide an additional layer of protection from dirt and small debris.
Step 11: Remove the tape
The process is complete. Now you can take all those tapes off and enjoy a brand new headlight experience.
You are also free to remove the tapes before buffing. If you are careful enough, no new scratches will appear on your car’s surface.
How Can I Restore My Headlights Without a Clear Coat?
The process is similar to the steps mentioned above. You just have to get rid of the 1000/1500-grit sand disk/papers.
First, use the 800/600-grit sandpaper/disk to remove the previous layer of the clear coat. Now sand the light down with 2000-grit sandpaper/disk. Remove all the grims and dirt from the light.
Once done, the light should become foggy. To clear it out, use regular buffing products and a buffer. Don’t forget to apply wax once you are done.
If you want to avoid sand disks/papers altogether, we recommend using a brake fluid and wiping the surface off with a piece of damp and soft cloth.
FAQs
1. Are clear coats bad for headlights?
Ans: No, clear coats are just there to prevent oxidation for longer. They don’t possess any threat to your car paint or design. However, they are prone to scratch damage.
2. Is applying a clear coat necessary?
Ans: Yes. Without the layer of clear coat, the paint would degrade over time, turning the headlights foggy real quick. Clear coats put up a wall between the headlight’s surface and the elements, protecting the lights and the paint for longer.


Leave a Comment