

When F150 owners talk about their trucks, they discuss the noise the truck may make at high speeds. Understanding what the noise can be and resolving the problem should be a priority. Here we look at the most common reasons for the humming noise, how to find the issue, and how to fix the Ford F150 humming noise heard while driving.
What is that noise?
While no noise is good when you own a vehicle, some noises are a sign of worse issues than others. A humming noise while driving a Ford F150 is no exception. The most prevalent reasons for the humming are a bad CV joint, an air vacuum leak, tire issues, and wheel bearings that are going bad.
Ford F150 Humming Noise While Driving
Possible issue 1: A CV joint is bad
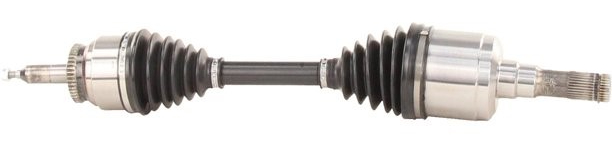
CV joints (constant velocity joints)
Part of the drive shaft is the CV joint. They require grease to stay lubricated, and a rubber boot keeps the grease inside the joint. As the rubber ages, it can crack, so the grease leaks from the boot, and dust and debris can get into the boot. Without the lubrication, the friction on the constant velocity joint creates wear. One day as you make a turn, you hear a clicking. Eventually, the clicking becomes a hum, and that joint requires attention as soon as possible
Confirming it’s the CV joint
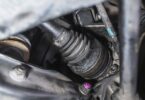
A faulty CV boot and bad wheel bearings both make a humming sound. Sometimes you need to verify that what you hear is the issue. Once you hear the clicking as you turn or the humming as the boot leaks, you need to look under the truck behind the wheel towards the front. Seeing a tear in the boot or grease leaking from the boot and on the undercarriage around the leaking boot will confirm you need a new CV joint.
Replacing an F150 CV joint
Tools
- Car jack
- Replacement CV joint
- Penetrating oil
- Old Rags
- Torque wrench
Since it is pointless to repair the boot, replacing the CV joint is the best option. Here we will replace the CV joints on a rear-drive truck.
Step 1: Safely jack up the truck and disconnect the battery. Apply penetrating oil to the retaining bolts, giving it time to soak in. This will make it easier to remove the bolts.
Step 2: Because it’s a rear Cv joint, you don’t have to take apart the suspension, but you will have to be careful as you use the wrench, so you don’t snag a brake line. Your best bet is to move the lines before you start.
Step 3: To remove the axle easier, loosen the link bushings on the sway bar’s end and the strut top mounts. Loosen only-Don’t remove them!
Step 4: Unbolt the wheel side axle mountings and remove them.
Step 5: Remove the axle from the wheel. To avoid damaging the oil seals, support the axle, so it doesn’t hang off the transmission.
Step 6: Without bending the axle seals, remove the axle from the transmission or differential, and ensure you do not tear the transmission or differential oil seals.
Step 7: When placing the new CV joint, place the existing ABS rings, axle seals, and other parts you removed with the axle onto the replacement axle in the order they were removed.
Step 8: Place the new CV joint in its spot and click the joint into place firmly. Tighten the axle bolts using the torque Ford recommends in the owner’s manual. Make sure the axle can rotate, then replace the parts you removed in the order you took them off.
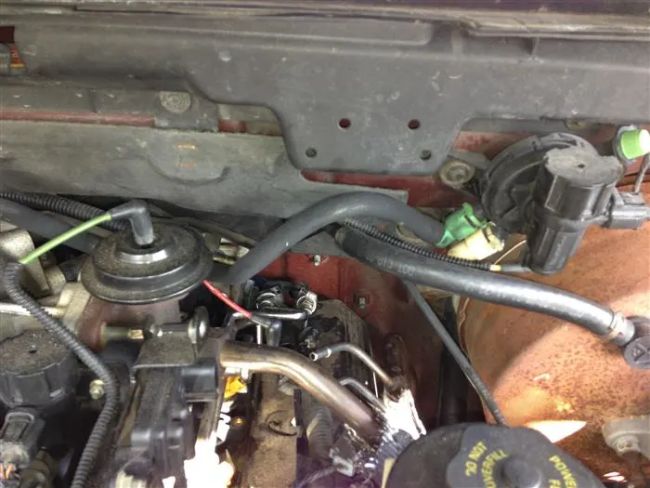
**Photo courtesy: F150 Forum
Possible issue 2: Ford F150 Air vacuum leak
Today’s fuel injection engines use the intake vacuum to regulate the actuators, power brakes, and sensors. When extra air gets in the engine, the air/fuel mix change can create issues as you drive.
Hearing a vacuum leak makes it simpler to find, but you may not always hear the vacuum leak, and when you do, locating it is easier than it sounds. Taking it to a repair shop using a machine to find the vacuum leak or finding it yourself are your choices.
Locating an F150 vacuum leak
Before starting, look at the owner’s manual and get familiar with your truck’s vacuum system. You need to understand what systems are controlled by vacuum and how they are connected.
Start the truck and examine the hoses for air leaks. Listen for the humming. You can use a stethoscope to hear a noise better and isolate its source. If you’re looking for a more technical way to detect leaks, you can use a leak detector. This video shows you how.
Depending on the size of the leak in the damaged hose, you can patch it with a vacuum hose connector. Small hoses are easy to repair, but larger leaks will mean hose replacement.
1. Patching a vacuum line
Tools
- Scissors or box cutter
- Vacuum hose patch kit
- Rags
- Gloves
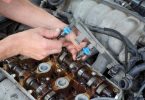
Step 1: Locate the leak on the hose. Turn the truck off. Holding the hose, cut the hose on each side of the leak. Place the hose on one end of the vacuum hose connector and push until the hosing is on as far as it can go. Repeat this on the other side of the patch tube.
Step 2: Restart the car to ensure the leak is gone once the patch is in place. At this point, there should be no humming or change in the RPMs as the car idles.
TIP: If you are patching more than one hose, do them one at a time to eliminate confusion.
2. Replacing a vacuum line
Tools
- Replacement vacuum hose or lines
- Screwdriver
Step 1: Ensure the car is off and disconnect the battery.
Step 2: Unscrew the vacuum line from the manifold, follow the line to the brake booster, and disconnect it from there.
Step 3: Connect the new vacuum line to the manifold and the brake booster. Tighten the screws using the screwdriver.
Step 4: Start the car and check for leaks. While the truck is idling, you have fixed the leak if the RPMs remain the same.
Possible issue 3: Tire tread issues
Tires that wear unevenly tend to hum, especially at high speeds. Dipping or scalloping between the tread is usually caused by wheels being out of balance, a poor wheel alignment, tires that are too inflated or underinflated, or the need for new shock absorbers. The humming is often mistaken for wheel bearings that are going bad.
Buying a poor-quality tire creates these problems quickly. The only way to fix this humming caused by cupping, scalloping, or dipping is to replace the tires
Possible issue 4: Bad wheel bearings
A wheel bearing is a metal ring that encases small reinforced-steel balls. The wheel bearings allow the tires to turn smoothly. The wheel bearing sets in the center of the wheel, and the other end attaches to the axle. Back in the day, you had to pack the bearings with grease. Today that is done at the factory where the bearings are sealed, so the grease stays in place, and dirt and moisture are kept out.
If a wheel bearing cracks or the bearings are cracked, they start to hum. It is hard to tell if the humming is coming from the bearings.
How to Check for a Bad Wheel Bearing on an F150
Tools
- Wheel chokes
- Car jack
- Gloves- optional
Step 1: Placing wheel chokes behind the back tires, Jack up the vehicle, leaving it on jack stands. Be sure the truck is secure, so you can safely shake the tires.
Step 2: Holding the tire on both sides, firmly try to wiggle the tire back and forth. If the tire wiggles, you have bad wheel bearings. You will also hear a squeaking sound as the tire moves.
Step 3: Repeat step #2 with your hands on the top and the bottom of the tire. Feeling the tire wiggle and the squeaking sound will reaffirm that the wheel bearings are bad.
Replacing F150 wheel bearings
Tools
- Replacement wheel bearing
- Socket wrench
- Flathead screwdriver
- 13mm and 18 mm sockets
Step 1: Remove the wheel once you have jacked up the car. Leaving it on the jack stand.
Step 2: Unclip the brake line and remove the caliper. Examine it to make sure it is good. If it needs replacing, do that while you have it off. After sliding the caliper from the rotor, place it somewhere the brake lines won’t be damaged.
Step 3: Remove the cap on the wheel bearing. Hold the shaft and remove the nut with a 13 mm socket.
Step 4: Attaching the hub to the wheel spindle are four bolts that need to be removed using the 18 mm socket.
Step 5: Attach the wheel hub (with bearings) and the steering knuckle using the 18mm socket and four bolts. Use the 13mm socket, tighten the wheel bearing center nut, and apply the cap.
Step 6: Replace the bracket for the brake calipers, then reattach the brake calipers. Replace the tire and retighten the lug nuts. Lower the car and remove the jack.
Step 7: Once the car is off the jacks, take it for a test drive to ensure the humming is gone.


Leave a Comment