
The only thing worse than a flat tire is having a flat tire and no jack. If it happens, you have no choice but to improvise.
Here you’ll learn three ways to jack up the car without a jack, learn to build a wooden ramp, and how to change a tire without a jack.
How to Jack up a Car Without a Jack?

Be careful!
The safest way to jack up the car is using an actual jack. When using the methods below, use common sense and be careful. Safety is first, last, and foremost!
Method 1: Using an incline
When choosing an incline like a grassy dirt hill, be sure the pitch is not too high. A high-pitched slope could cause the car to roll back on you.
If it is an earthy incline, make sure the soil is not crumbly like a sand/dirt mix or the ground is too wet. You don’t want the surface to crumble in the middle of changing your tire.
Quick tip: A thick curb is ideal for a jack to jack up the car when you don’t have a jack.
When changing a rear tire, you want the front of the vehicle to be at the top of the slope. If you are changing a front tire, you want the back of the car on the slope.
Approach the incline at an angle so the car appears to be beached. You want the tire you are working on to be above the ground enough to work on it comfortably.
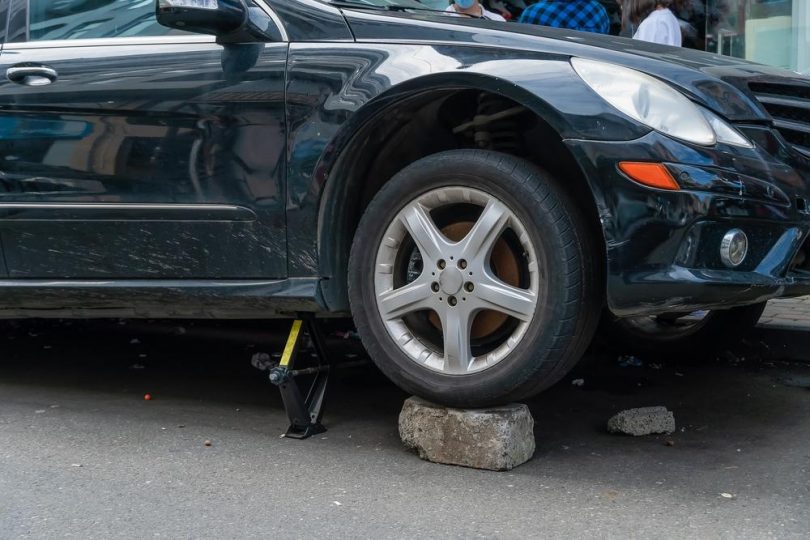
Once the car is in place, turn off the engine and put the parking brake on. Then find something like a rock or thick piece of tree you can place behind the tire on the incline that will act as a wheel chock and keep the wheel from rolling back.
Once you stabilize the car, you can start changing the tire.
Method 2: Digging out the dirt
In this scenario, you need to find an area that is mostly bare dirt. Then, park the car and gather flat stones, small logs, or thick sticks. You need them to place under the vehicle where you would put the jack (in front of a back tire under the frame).
If you haven’t jacked up a car before, check your owner’s manual for the information. Your logs will support the vehicle so you can get the tire changed.
Once you have the car stabilized, remove the dirt under the flattened tire using a piece of wood, an ice scraper, or your hands.
When you remove enough soil to get the tire off quickly, you can start changing the tire.
Method 3: Using a Lever
Using a lever is not for the weak. There is strength needed to lift the car high enough to prop it up. You also need a second person because you can not push on the lever and simultaneously place something under the vehicle.
To create a lever, you will need a piece of wood thick enough to lift the car. Also, a rock or very thick tree limb acts as a fulcrum (the object you will push the lever against to create the leverage to lift the vehicle). Finally, a significant object or several small ones to place under the frame to hold the car up once it is in the air.
After you have gathered everything you need, place the stone or tree limb (fulcrum) behind the car leaving enough room to set your tree limb or metal rod against the rock while pushing on the back of the vehicle.
Place the item to stabilize the vehicle in front of where you will place it under the car, so the second person can quickly push it into place. Next, put your weight on the lever to lift the end of the vehicle on the side where the flat tire is. Finally, the second person pushes the stabilizer under the frame as you jack up the car without using a jack.
Before changing the tire, test the car to ensure it is safely on the stabilizer and can’t fall while working. If the vehicle is stable, you can get the tire changed.
How to Make a Wooden Car Ramp?
If you want to change a tire or work on your car and you don’t have a jack, you can make a set of inexpensive wooden ramps that you can you use.
Materials
- Two -12-foot 2 x 10s
- Exterior wood screws 2.5-inches long
- Small can of liquid rubber
- Paintbrush
- Hammer
- Drill
Cut your 2 x 10 into the following sized pieces: 11″, 25″, 30″, 36″, and 42″. This ramp works for 35″ tires. If your tires are larger, you will want to make the pieces large enough to accommodate your vehicle. You will need one or two more boards.
Step 1
Cut the one edge of each piece at a 45-degree angle. Leave the other side the way it is. This angle makes it easier to drive the car up the ramp.
Step 2
To avoid the wood splitting as you screw in the screws, use the drill to make the starter holes. Then screw the 36-inch boards on top of the 42-inch pieces.
When screwing the 30-inch piece to the 36-inch board, change the screw location to maintain the strength of the wood. Next, add the 25-inch piece and move the screws again.
Step 3
Attach the 11-inch piece of board to the flat side of the ramp. The board keeps the car from rolling forward off the ramp.
Step 4
Take the two 42- inch bottoms of the ramp and paint one side with the liquid rubber. One coat should be sufficient, but you can do as many as you like. The rubber will help keep the ramp in place as you drive on it.
Once the rubber is dry, your ramps are ready to use. You can use these ramps to change a tire without using a jack. When using the ramps, be sure to check the wheels for added safety.
How to Change a Tire Without a Jack?
Step 1
Find a suitable place to pull over. While it is preferable to use a jack to change your tire when you don’t have one, use the above method to change your tire without using a jack. Put your hazard lights on if you are in a high-traffic area.
Step 2
Stabilize the car (using the methods above) with the wheel high enough for you to change the tire. Next, remove your spare tire and tire iron from the trunk.
Step 3
The hubcap needs to come off. Then loosen the lug nuts using the tire iron, turning the lug nuts counterclockwise. Once the lug nuts are loose enough, remove them and put them in the hubcap for safekeeping. You may need to use force to loosen the lug nuts. Try not to step down on the tire iron, so you don’t strip the lug nuts.
Step 4
Take off the tire by pulling it toward you. If the tire sticks, you can wiggle it from side to side and shimmy it off. If there is room, place it under the wheel so if the car falls, the wheel lands on the tire. If there is not enough room, set it to the side.
Step 5
Place the spare tire on the wheel. The side of the tire with the valve stem should face you. Place the lug nuts back, then tighten them with your hand, turning them clockwise. Snug the lug nuts with the tire iron but not too tightly. Once you’ve lowered the car onto the ground, you finish tightening them.
Step 6
Now, lower the car to the ground and finish tightening the lug nuts. Place the flattened tire and the tire iron back in the trunk.


Leave a Comment