
Many vehicle manufacturers have replaced the manual emergency brake with an electric parking brake. While the brake works well, it also has some issues.
Here we will look at problems and solutions for electric parking brake issues, and provide a step-by-step guide to troubleshoot an actuator brake motor.
What Happens When Your Electric Parking Brake Fails?
If the electrical brake has failed, one of several things may have happened. Common issues include an open (blown) fuse and low voltage to the system. Between the module and actuator, there are switches and wires. If these blow, short out, break, or become resistant to the electrical current, the electrical brake will not work.
Signs of electric parking brake actuator issues
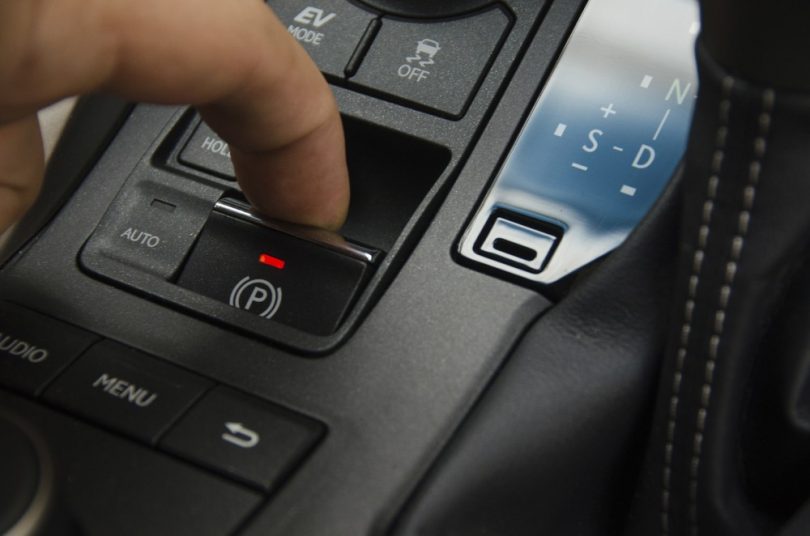
1. Parking brake light flashes
The parking brake light flashes when the electric parking brake is engaged and needs to release before you can drive the vehicle or if there is something wrong with the brake. If you remove the brake and the light remains lit, you must look into the problem as soon as possible.
2. Check brake light shows on the dashboard
Any light on the dashboard is to alert you to a problem. If the brake light is showing, there is a problem with the electric parking brake. You can use an auto-scan tool to read the code to pinpoint and fix the problem.
Electric Parking Brake Issues

1. Electronic issue
Somewhere between the actuator, EPB switch, and the module, there is an open fuse, a short or high resistance.
Solution:
- Open fuse – Check the vehicle’s manual and locate the parking brake fuse. These are color-coded, so if the fuse is green, you will replace it with the same color fuse, ensuring the correct amperage.
- Short in the system – Check the wires and connectors to and from the actuator by jiggling them. Retighten loose wires and connectors, and press the electric brake button to see if it works. You would need to see a mechanic if reconnecting loose wires did not fix it.
- High resistance – To check resistance, you must use a digital volt ohm meter (DOVM). You are checking the resistance between both motor terminals. You will get an “OI” reading if the motor is faulty. If there is a short in the motor, you will see a reading below 10k. If you are mechanical, you can also ground your actuator and apply power to test this.
2. Faulty actuator motor
The actuator motor applies the brake shoes setting the caliper in motion to squeeze the rotor to stop the vehicle. When the actuator motor is faulty, the caliper is not set in motion and the electric brake doesn’t work.
Solution:
Check the actuator motor resistance with a multimeter. A Mega ohm reading of Two in
3 seconds indicates a faulty motor. A faulty motor will need replacing immediately.
3. Bad gear shift selector switch
The gear shift switch sends a signal to the controller to turn the brake off and on. When
the switch is bad, no signal is sent, so the brake does not work.
Solution:
The easiest way to test the switch is a scan tool that reads the voltage and gives you a reading that indicates if the switch is alive or dead.
Without a scan tool, you will have to check the voltage changes as you check the button-out put wiring.
4. Bad brake pedal switch
When you press the brake, the brake pedal switch tells the car to activate the brake. If the brake pedal switch is bad, nothing will happen as you press the brake.
Solution:
The easiest way to check for a bad brake pedal switch is to have someone watch the brake lights when you step on the brake. No brake lights mean the switch is faulty.
You can also test the switch with a multimeter. No matter how you test it, a faulty brake pedal switch located under the brake pedal needs to be replaced by you or a mechanic.
5. EPB module and switches aren’t communicating
If the EPB module and switches are not communicating, there is a short or loose wire between them.
Solution:
Follow the wires between the EPB module and the switches to find loose or broken wires and replace or plug the wires into place. After finishing, turn on the car and press the EPB button to test the electric parking brake, which should work. If not, the module or switches are the problems, and you will need to test them individually to find the faulty wires or plug-ins.
6. Sticking/corroded parking brake cables
Corrosion is very common because the wheels and braking system are close to the ground and pick up debris as you drive. Salty roads can rust and corrode the brake cables and cause them to stick.
Solution:
The solution should be as simple as cleaning the cables, but depending on how corroded the cables are, it may not. The easiest solution is to spray some brake cleaner on the cables, let it soak in and clean them with a soft cloth.
If that doesn’t work and they are so corroded, they are frozen. You will need to move the brake cables manually. If this does not work, a mechanic is your best option.
7. Electric parking brake requires special tools for repair
The electrical parking brake system is complex and more challenging to work on than traditional brakes. Mechanics use a scan tool and have to disconnect the system before they can begin repairs. If the system is not disconnected or you do something incorrectly, you can do severe damage to the electrical brake system.
Solution:
If you know how to use the scan tool, you can get the scan code and repair the issue. If you have no scan tool and have no idea how to fix the problem, a trip to a mechanic is your best solution.
How to Troubleshoot an Actuator Motor?
Tools you need
- Car jack
- Jack stands
- Wrench
- Multimeter
Step 1: Parking the vehicle
Park the vehicle on dry, flat ground with the car off. Put wheel chocks behind both rear wheels.
Step 2: Loosen lug nuts on the affected wheel
On the wheel with the problem, loosen the lug nuts using a wrench to turn the lugs counter-clockwise. Just loosen them, do not remove the lugs.
Step 3: Taking off the wheel
Jack the car up high enough to remove the tire. Put the jack stands in place for your safety. Then, remove the lug nuts using the wrench and take the wheel off the car.
Step 4: Locate the caliper’s electric connector
Use the car’s manual to find the electric connector to the caliper. Once you’ve located the connector, disconnect it by pushing the tab locks and pulling off the connector.
Step 5: Check the electric actuator motor’s power supply
Using the multimeter, set it to measure the direct (DC), then place the probe on the DC icon (a straight line with three smaller parallel lines beneath it). Locate the connector on the primary harness wire placing the black and red leads to the same color ends on the connector.
Step 6: What is the voltage reading?
The multimeter should read low to zero at the start. Have an assistant start the car and put the parking brake on. Once the vehicle is on, you want a reading between -10 to -12 or 10 – 12 volts which is good power for the actuator. If the reading is below 10, you must look at the fuse and wiring. You don’t need to worry about polarity because the leads are interchangeable.
Pro tip: If you use an older multimeter with voltage ranges, don’t set it in any setting ending in mv (millivolts). When you use it on a 12-volt system, this could ruin the multimeter.
Step 7: Actuator testing
Before testing the actuator, test the multimeter to ensure it works properly. This is done by setting the beep and the leads. If you get a reading above zero ohms, replace the leads before testing the actuator.
A zero reading is ideal, and the multimeter is good to go.
The actuator solenoid winding needs checking to ensure the circuit is not interrupted. First, locate the caliper and the connector attached to it to check for actuator winding damage.
Using the multimeter, set to ohms (some meters may say continuity), the icon looks like the Greek letter Omega. If the actuator winding is working, you should hear a beep. This means the problem is something else, possibly the switch. The actuator solenoid needs replacing if you do not hear a beep.
Step 8: Put everything back together
Once you finish replacing the solenoid or determine it is something else. Remove the jack stands. Put the tire back on and tighten the lug nuts using the wrench in a clockwise direction. Jack the car down and put the jack away. Retighten the lug nuts, then remove the wheel chocks.


Leave a Comment