
You might be being overwhelmed by your headlight’s yellowing and clouding plastic surface. Well, the reason is the wear and tear it takes from grits and rocks to the sun’s UV rays every single day.
You might have tried protective clear coat layers on your vehicle’s headlight to help it last longer. Well, great clear coating layers can provide you with the best protection for a long time but what’s next?
Clear Coating Headlights – Step By Step Guide
Clear coating headlights can give the coat a whole new uneven look. Wondering? Well, this article covers how to restore your headlights. Wholly read on the step-by-step guide to do the task yourself.

Things you need:
- Patience
- Drill
- Rubbing alcohol
- Rubbing compound (3M)
- Sandpaper (Grit: 800, 1000, 2000)
- Microfiber cloth/ rag/ small towel
- Shop towels
- Water spray bottle
- Odor-free mineral spirit
Step 1: Preparation
Firstly, you have to get things ready. Do not lose your patience because it will take time. In the meantime, fill your spray bottle with water. Adding a few drops of soap to the bottle to lubricate the headlights can be a plus.
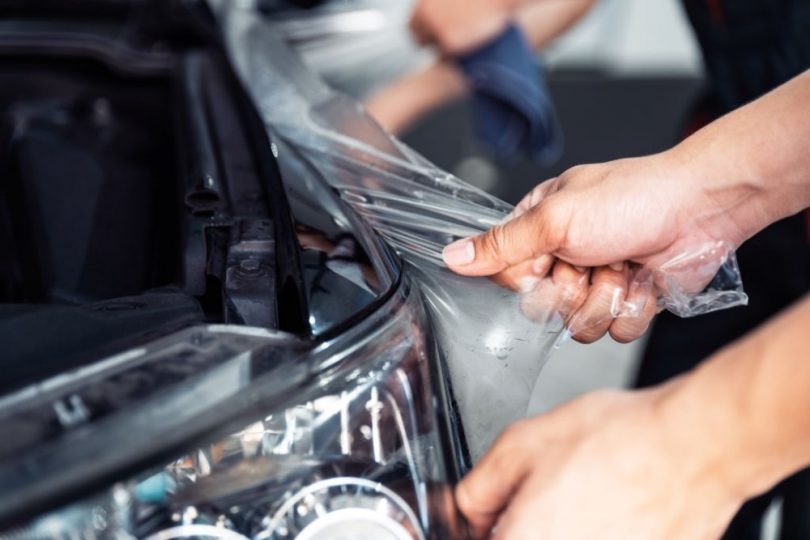
Now tape up the area throughout the headlight which is the most important part of this DIY process. Tape up the surrounding painting because you won’t like to fix your painting after doing such hard work.
Take your 800 grit sandpaper and cut the sheets into ¼. Spray water on a sandpaper sheet and put it on the headlight. Now keep spraying the whole headlight to make it wholly wet.
Keep spraying while sanding the headlight to help the sandpaper sheet last longer and to make the sanding easier. Sand every single edge and corner.
Sanding from one direction is recommended to make the process easier and to check if the sanded lines are consistent. Keep sanding until you notice a uniform surface. Now use your towel to wipe the surface to check if all the oxidation has removed.
Step 2: Dive into more sanding
After finishing with 800 grit, it’s time to resand your headlight with 1000 grit sandpaper. Sand in one direction again and keep spraying to lubricate. Make sure you’ve sanded over the headlight. Once you notice a uniform finish and the headlight looks more clear, wipe it off and go to the next step
Step 3: Move to 2000 grit
Sanding your headlight with 2000 grit sandpaper is a vital part of the process. The more time you spend on this, the better result you’ll get. Follow the similar process described in steps 1 and 2. Remember- lubrication is much important in this step.
After sanding for a while you’ll find a more uniform finish and cleared up headlights. By this, you’ve successfully ended up sanding. Now get a break and prepare for the next step.
Step 4: Let the magic start
Now get your hookit pad attached drill and take the compound pad. You can also get a wool buffing pad instead. Shake the rubbing compound well and apply a decent amount on the headlight.
Now rub it on the headlight without turning on the drill. This is for getting rid of splattering all over when you turn on the drill.
Start polishing the headlight slowly by turning the drill on. As you notice the compound spreads all over the headlight, turn the drill on to full speed to cover the whole area.
This process will remove all the scratches made by 2000 grit paper and will make the headlight look new and shiny. Do not forget to apply more compounds if needed. Remember- the headlights will shine according to how well you did.
Step 5: Finalizing
Cheers! You’ve done amazing hard work. Now you need to protect your car’s headlights from turning back to the way they were. This is why the Minwax spar urethane is needed for.
Get your measuring cup and mix half an ounce of urethane and the same amount of mineral spirit to produce 1 ounce of clear coat. Gently stir the mixture and wipe the headlights using a shop towel and rubbing alcohol. This is how you can remove the compound left. Not touching the headlights for a while is recommended. You can also opt for a car wash.
Now it’s time to apply the clear coat. Start applying from the top and go horizontal. Try to apply a nice thin coat without any runs remaining. After done applying the clear coat, it will start being thick faster. Don’t worry if you make any mistakes. You can take off the coat using a shop towel with mineral spirits to start over.
Now give the coat at least 30 minutes to dry. Do not touch the coat for 4 hours because the top layer may remain wet. Drying it overnight can be the best option.
Conclusion
Hopefully, this guide has helped you learn the process of restoring your headlights. You can use this expertise to restore your headlights further. Remember the first task can be messy but once you master these steps, you’ll enjoy the work. Have a safe drive with your restored headlights and enjoy quality music on your car speakers.
If you have any queries, feel free to let us know in the comment section below.


Leave a Comment