
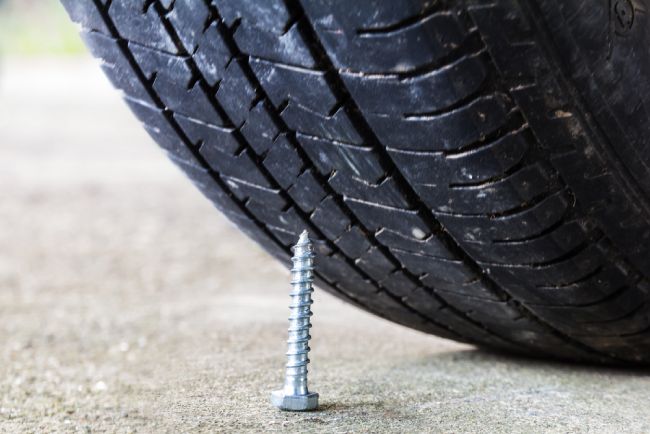
If you drive around construction/demolition sites there is a pretty good chance your tires have picked up a nail or two. It’s not like someone purposefully flattened your tires with a nail without you noticing, not in most cases that is.
What happens is, nails usually lay flat over the rough street. When your front tires pass over them at a high speed, they get rolled up and tossed because of the friction force. Friction force works the opposite direction your tires are moving.
As a result, the kicked-up nails get tossed in front of your rear tires. In an unfortunate event, the nails hit the rear tire at the right angle and the weight of the tire pushes the nail through the tire tread.
However, the tire doesn’t pop right away. With every rotation, the nail digs deeper into the tire. Modern-day tires have a protective layer of steel belt in the middle section of the tire. If the nail is big and strong enough, it can pierce even through the belt.
That’s why rear tires usually get flattened by nails the most. However, a nail can pierce the front tires and the sidewalls as well.
How Do Nails Get In Tires
Are Nails in Tires Common?
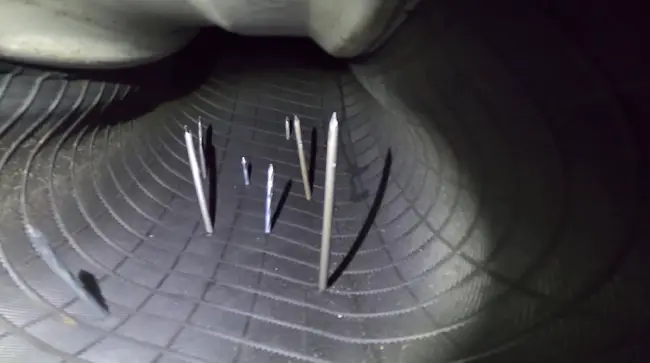
Unfortunately, yes. There is a lot of sharp debris on the road, including nails that can pierce your tires. It may seem like someone is deliberately pulling a nasty prank on you, but the chance of that actually happening is pretty low.
The chances of getting a nail through your tires increase if you regularly commute around construction/demolition sites.
However, you can get a nail on your tire from almost anywhere on a bad day.
How to Know if You’ve Got a Nail in Your Tire?
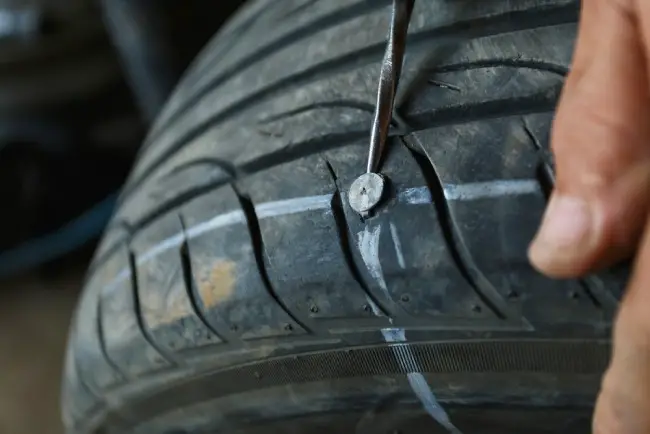
It’s almost impossible to know if you’ve got a nail through your tires right away. If you notice a stub or cap of the nail attached to your tire, that’s one way to confirm.
In case the nail gets completely buried in the rubber tread, that will be a bit harder to verify. Any tire that has a nail piercing through it will leak out air at a steady rate. That is why if you notice a gradual deflation of your tire, you most probably got a nail in your tire.
One other way to make sure you have a nail in your tire is the sound it will make while you drive. When the nails come in contact with the road or other vehicle parts, it will make a distinctive “click” sound repeatedly.
However, nails aren’t the only reason you can have steady gradual deflation. We recommend you take your tire to the experts or check for leakages on the tire yourself. Just apply soap water over the tire and see if any air bubble pops up or not.
Steady air leakage will create bubbles around the hole and you can be sure about where the repair is needed.
?Can a Nail Puncture a Tire Sidewall?
Yes. a puncture in the tire sidewall is more dangerous than the one at the stronger middle section of the tire. Modern-day tires are called ‘radial’ tires and they contain a layer of steel bands in the middle of the tire to help stabilize and strengthen the road contact surface.
The sidewalls don’t contain any steel band and are especially prone to get punctured by a nail. Sidewall punctures are comparatively rare but have the chance to do much more damage.
And the repair is also trickier. A hole on the sidewalls of your tire can turn your tires street-illegal, meaning your tires will no longer be safe to use on public streets.
Can You Drive With a Nail in Your Tire?
Once a nail pierces through the protected side, it will penetrate deeper into the rubber tread with every rotation.
If you are lucky, the nail will hit the rubber tread block and get stuck there. As a result, the nail will lodge in so tightly that air can’t escape. That is relatively harmless and will only cause you slight inconvenience.
If a nail pierces through the sidewalls, you’ll have less time on your hands, not more than a couple of minutes, to get the tire fixed. Just go to the nearest tire shop and get your tires fixed.
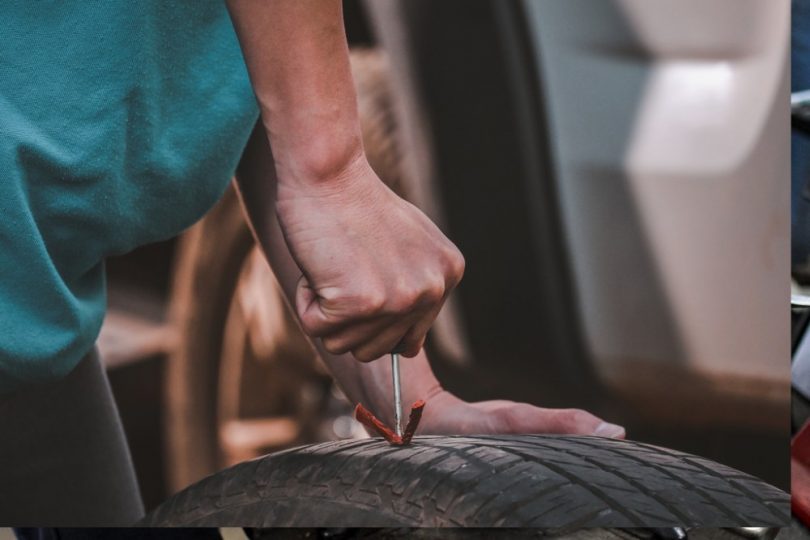
With proper tools nearby, you can fix the tire temporarily yourself. However, this is not a permanent solution and you should contact the professionals as soon as possible.
Do You Need a New Tire if I Have a Nail in It?
Well, it depends on factors like the age of the tire, the size of the puncture, and its location on the tire. If your tire gets pricked on the sidewalls, we recommend you get a new one. The sidewalls don’t have steel reinforcement and are vulnerable and can’t be patched up.
If the hole is large, it’ll be tough to try and fix them. The same goes for worn-out old tires. Consult your local experts to be sure if you need to replace your tire or not.
How Much Does It Cost to Fix a Nail in a Tire
It depends on the size and location of the puncture. In general, it should cost you no more than $10-25 in your local repair shop.
However, if the puncture is in the sidewalls, the repair cost will be significantly higher. We don’t recommend repairing punctures on the sidewalls.
If you strike a special deal with some car specialist or do the repair yourself, the cost will reduce significantly. Just invest in some tools and you’ll be able to fix a nail in a tire anywhere and without any cost.
Is a Nail in a Tire Covered Under Warranty?
There is a special type of warranty named “Road Hazard Warranty” that covers damage to your tire caused by non-negligent driving. This is basically an insurance policy and is especially beneficial for those who use low-profile tires.
This type of warranty won’t cover damage caused to the car because of user errors like mounting the curb or underinflation. For most average users, a good car insurance policy is a better investment.
Is It Better to Plug a Tire or Patch It?
It also depends on the type of damage your tire has been received. Many people prefer plug as it is quicker, easier, and can help your tires to run for up to 25,000 additional miles.
However, patching is considered a more secure option among the two. In this process, a rubber patch is attached to the inner surface of the tire where the hole is. Rubber cement is used to secure the patch with the tire. This process takes much more time and effort.
You can also use a hybrid of the two methods usually known as “the patch/plug combo” to get your desired amount of repair. This is the safest and most reliable option.
How to Avoid Nails in Tires?
Check tire air pressure
Regularly check the air pressure of your tires. Overinflation increases the risk of damage from potholes and other obstructions in the road. Underinflation will create more friction and stress the tire.
Having your tire pressure within the acceptable range will not only give you better protection against nails but will also make your tires last longer.
Rotate your tires
Not all tires wear out evenly and that increases the chance of a puncture. If you rotate your tires periodically, your tires will wear out evenly and last a lot longer.
Check tire tread depth chart and load index ratings
Every tire has wear bars so that you can figure out when you need new tires. A damaged tread is much more likely to be damaged by a nail than a new one. Check the tire tread depth chart to measure your tire health and buy a new one before the previous one goes beyond repair.
You should also keep an eye on the load index ratings. The maximum load rating of your tire is printed on the center of the tire’s sidewall. The heavier the load gets, the easier it will be for a nail to pierce through your tire.
Watch where you drive
Nail punctures most frequently occur near construction or demolition sites. There are usually a lot of nails lying around in such areas that can puncture your tires. It would be wise to also avoid refuse dump, clustered patches in the road, or debris heaps.
How to Fix a Nail in Your Tire?
There are two primary fixes for a punctured tire. One of them is plugging and the other one is patching. Your local tire shops can do both.
However, if you want to fix your tires yourself, here’s how you do that.
1. Plugging
Tools Needed
- Safety gears
- Pliers
- Screwdriver
- Air pressure gauge
- Portable air compressor
- Tire plug kit
- Soapy water
- White pencil
- Anti-cutter
- Tire plug kit
Steps
- Find out the hole in your tire and locate the nail. Spray soapy water all over your tire. The escaping air will create bubbles and you’ll find the puncture easily.
- Check the air pressure of your tire and place the hole on the top side of the tire. You can detach the tire or use car jacks if you feel the need. If your tire is completely flat, inflate it before you start fixing it.
- Use the pliers and screwdriver to pull out the nail. Mark the area with a white pencil.
- The plug kit contains two needle-like tools, some plugs, and rubber cement. Take them out and use the grooved needle immediately after you pull the nail out. This will clean the hole and make it ready for the next steps.
- Shove the grooved needle onto the hole and give the hole a good file back and forth. Go in and out a couple of times.
- Now take the other needle-like tool and a plug. Pass the plug through the head of the tool and apply rubber cement over the plug.
- Once the filing process is complete, take out the grooved needle and immediately put the needle with the plug into the tire. Use force and send the plug ? of its length. Make sure that both ends of the plug stay outside the tire.
- Make a quarter turn with the needle and pull the needle out swiftly in one strong fell swoop. The plug will remain inside the tire.
- Cut the excess plug out with an anti-cutter and check the tire for any leakage again with soapy water.
- Check the tire pressure again and use the compressor to regain the lost air pressure. You’re done.
2. Patching
Tools Needed
- High lift car jack
- Soapy water
- Lube (Liquid soap/WD-40)
- Crowbar/pry bar/large screwdrivers (3 of them)
- Breaker bar
- Cleaning chemical (Starting fluid)
- Small brush and marker
- Roller tool
- Tire patch
- Buffing wheel
- Air compressor
- Air pressure gauge
Steps
- Take off the tire and dismount it. Use a high lift jack to loosen the wheelbase from the tire.
- Apply lube around the wheelbase so the rubber slips out easily. You can use liquid soap or WD-40, whatever is accessible to you.
- Use the pry bars and detach the tire from the wheelbase completely. If the nail is still stuck in the tire, remove it.
- Take your tire tool (from the plug kit) and clean the hole. Use the grooved tire tool to get rid of any debris and make the rubber a little rough so the rubber cement works the best.
- Mark the area with a marker and apply a good amount of cleaning chemicals. We used a starting fluid but you are free to use whatever you have.
- Take a small brush and clean the area you are going to put the patch. Clean the area with a damp cloth.
- Now if the tire is engraved in designs and patterns, use a buffing wheel to expose the rubber underneath. This will help the patch to stick better.
- Apply some rubber cement to your tire tool and shove it forward and backward through the hole to make sure that the hole has enough cement inside it.
- Take a brush and apply rubber cement to the whole area the patch is going to cover. Leave the cement for about 2 minutes to dry.
- Take the patch out of its packet and place it over the selected area. Avoid touching the sticky side of the patch.
- Once the patch is in place, use the roller tool to expel any of the air stuck inside. Start from the middle of the patch and gradually fo over the edges a couple of times.
- Clean the inside of the tire with a damp cloth.
- Lube up the tire again and reattach it with the wheel using pry bars. Don’t put too much stress on the tire.
- Once that is complete, inflate the tire using an air compressor. Make sure your tire pressure isn’t lower than before. Use the air pressure gauge to achieve the desired pressure.
- Check the tire for any remaining leakage by spraying soapy water over the repaired hole.


Leave a Comment