
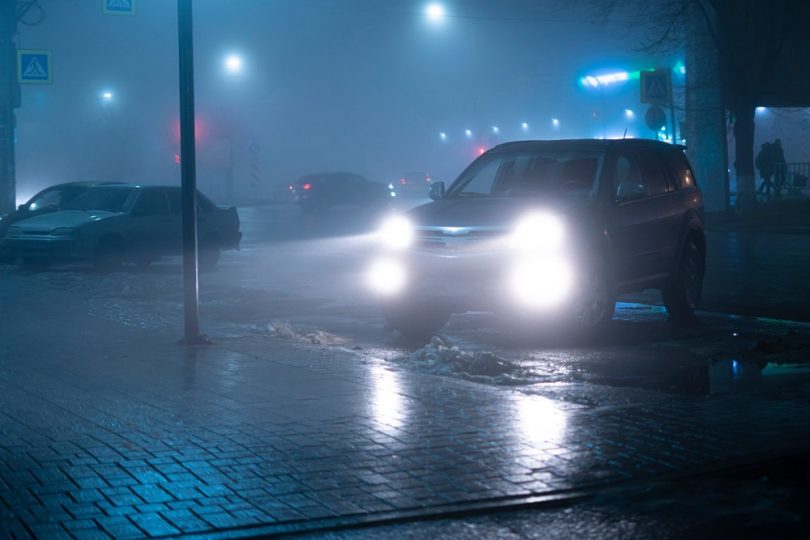
There is nothing worse than your fog lights shining everywhere but where you need them the most. Fog lights not only help you see in bad conditions, but they can keep you from having an accident.
Here in this step-by-step guide, you will learn how to aim your fog lights like a pro with helpful tips to make it easier.
What to Do Before You Aim the Fog Lights?
-
Make sure the gas tank is half full
It would be best to have half a tank of gas or more in the vehicle when aiming the fog lights. The gas will help ensure the fog lights are correctly aimed at your average driving weight.
-
Have someone sit inside the vehicle for weight
Having the weight of a driver in the car will help make sure the lights will be at the correct height when you are driving the vehicle. You want to have the same weight in the car as you would if you were driving, so you get an accurate aim when you adjust the fog lights.
-
Make sure all the tires have the correct air pressure
Check to see your tires are at the proper PSI, so the car will sit at the right level when you adjust the fog lights.
-
Park the car in front of a wall on level ground
The car must be facing a wall or garage door and parked on level ground to adjust the fog lights so the beams are at the correct height for driving. You don’t want one fog light on the road and the other shining towards the ground.
How to Aim Fog Lights?
Step 1: Gather the tools you’ll need
- 12 inch-long Philips head screwdriver
- Measuring tape that measures at least 25 to 30 feet
- Roll of painter’s tape
- Black sharpie
Step 2: Park the car three feet from the wall
Measure three feet from the wall (you can also use a garage door) and mark it with tape on the ground. Park the car on the mark and make sure the pavement is level where you are parked.
Step 3: Align the center of the car with the painter’s tape on the wall
Place a vertical strip of painter’s tape on the wall using the emblem in the center front of your vehicle as the guide for the tape placement.
Step 4: Find the middle of the fog light
Most cars have a marking such as a circle on the outside of the light where the center of the light is located. This mark will help to measure for aiming the fog lights. If your light does not have a manufacturer’s mark, you can use the middle of the headlight bulb as your mark.
Step 5: Measure the height from the ground to the center of the fog light
Using the tape measure, measure the height from the pavement to the fog lights center.
Step 6: Mark the wall directly in front of each fog light with the painter’s tape
Once you have that number, use the tape measure to place your tape vertically on the wall across from each headlight.
Step 7: Place a mark on the fog light height with the tape.
For example, if your light height is 27 inches, you need to place your tape vertically on the wall 27 inches from the ground and directly across from the fog light’s center. Then, make a horizontal line using the sharpie to mark the 27-inch height on the tape.
Step 8: Two inches below the centerline, make another mark
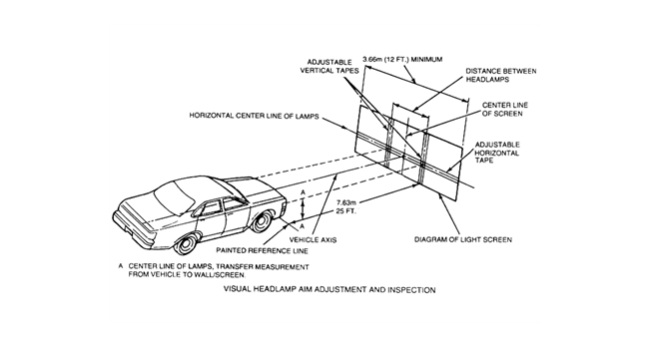
**Photo Courtesy: Fixya
Measure 2 inches below your center line and make a second horizontal line. Next, place a vertical piece of painter’s tape below your centerline on the line 2 inches below. When you finish, you should have a cross on the wall.
When adjusting the fog lights, you want to adjust the light to the bottom edge of the tape 2 inches below the 27-inch mark (the bottom of the vertical piece of tape you just put on the wall.)
Step 9: Repeat steps on both sides
You will need to do this for both sides of the car.
Step 10: Park your vehicle 25 feet away from the wall
Backing up your car, you will need to be 25 feet away from the wall. If you are not good with eyeballing distance, you can measure the 25 feet with the tape measure and place a piece of tape on the ground as a mark.
Step 11: Turn on the foglights and get underneath your car
Once you are ready to adjust the fog lights, be sure the driver is in the car and have them turn on the fog lights as you crawl under the vehicle. Some cars let you adjust the fog lights from a screw located in the front of the engine under the hood.
Step 12: Locate the holes for the screws that adjust the height of the fog lights
Use the owner’s manual to locate the screws that adjust the fog lights.
Step 13: Use a screwdriver to get in the hole for the screws
Once you have located the screw and the hole, place the screwdriver in the hole and on the screw. Some cars may have a groove that the screwdriver can lay in as you turn the screw to adjust the fog lights.
Step 14: Put pressure on the gear by moving the screwdriver handle towards the front of the bumper
Put enough pressure on the screwdriver to line up with the adjuster gear. You are using the screwdriver to turn the adjusting screw easily.
The Philips screwdriver should line up with the adjustment gear as you move the screwdriver toward the front bumper, creating a cog-type motion to adjust the fog light height. Pushing the adjuster gear forward will help with this.
Step 15: Screw clockwise or counter-clockwise, adjusting the level of the fog lights
Depending on where the top of the fog lights illumination is, you turn the adjustment screw with the screwdriver counter-clockwise or clockwise (to the left or right.)
Step 16: The light output should reach the second marking line when it’s above the headlight center
Continue adjusting your fog light until the light output is at the bottom of the second tape at the second mark on the wall.
Step 17: if the light output is below the second marking line, raise the light output
If your fog light shines below the second line, continue to adjust until it is even with the edge of the tape’s bottom.
Step 18: Do it for both sets of fog lights
Once the first fog light is adjusted, adjust the second fog light using the same steps.
Step: 19: The test drive
When both fog lights are adjusted, take the car for a drive to ensure the fog light beams are even. You don’t want to be driving in the fog and find out they need more adjusting.
Tips for aiming your fog lights
- Clean the headlights and fog lights before starting
- Aim the fog lights at dusk, once it is dark, or in a dark garage for better aim
- Adjusting your low beams should readjust the high beams in most cars
Are LEDs good for fog lights?
They are being used more and more for fog lights because they are a cooler color, so they do not burn as hot, and they are brighter than the halogen fog lights. They are also more expensive, but you will get your money’s worth since they last for years.
Do you have to drill new holes for fog lights?
While most cars now come with fog lights, you may have to do some wiring and drill a hole for your fog lights if there is no space for them.
Check out the video below that will help you install the fog lights-


Leave a Comment