

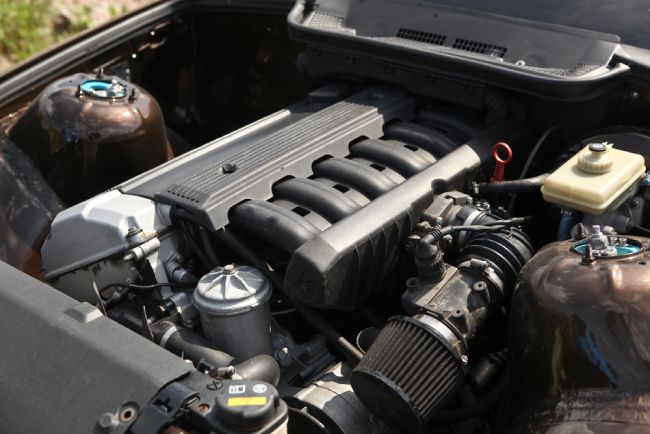
A cold air intake is one of the first parts to be added when customizing a car. This is because of internal combustion and the fact that it relies on air, fuel, and sparks to work properly.
Even a minor improvement to this system can cause a major boost to your car’s performance.
Why Replace Your Factory Filter?
The main reason to replace your factory filter is for performance. Even if the improvement isn’t noticeable, a cold air intake system does so many things for your car behind the scenes.
It provides more oxygen to your engine, which helps it put out more power. Your car will also be able to speed up more than usual as gas is being burned more efficiently, which also benefits you monetarily.
Last, your acceleration system will be so much more responsive because of the greater amount of air.
Cold air intakes are relatively inexpensive, but they provide so much value, and overall, are a modification worth making.
How to Install a Cold Air Intake?
Tools
- Flathead screwdriver
- Phillips screwdriver
- Pliers
- A Ratchet
- Sockets
- a torx or allen wrench set (depends on your vehicle)
- Cold air intake
Cold Air Intake Installation Steps
-
Step 1: Turn off your engine
The first step for installing a cold air intake is to turn off your engine. Whenever you are doing any sort of repairs on your car, it’s important to have your engine off to reduce the chance of harm or an accident.
-
Step 2: Unplug the car battery
Next, you need to unplug the car battery. It is a possibility that your air-filter has a circuit that needs to be taken off for removing the air sensor.
Leaving the battery plugged when you remove the air filter may also cause short circuits, which can lead to sparks and other dangers.
For this reason, please make sure that the battery is unplugged before moving to the next step.
-
Step 3: Remove the sensor from the old intake
Carefully remove the sensor’s circuit after the battery is unplugged. If you aren’t sure that there are any air sensors attached to your existing air filter, look at the car manual to be sure.
-
Step 4: Remove the hose clamp holding the old intake box
Carefully remove the clamp and secure the intake box to the intake manifold. This will allow you to get the old filter off the hose leading to the engine.
-
Step 5: Unscrew the old intake box
If there are any screws that are holding the intake box to the car, remove them. After doing that, you should be able to just lightly pull on the box to make it come out.
-
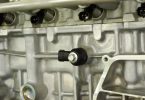
Step 6: Uninstall the mass airflow sensor from your old intake
There should be two head screws securing this sensor. Remove them with a screwdriver and set the sensor somewhere safe in the meantime.
-
Step 7: Remove the tray and other parts of your old air-box
To install the cold air intake, you’ll need to remove the old air box’s tray and breather tube. This is to create space for the new intake system, as there isn’t enough room with these components in.
-
Step 8: Place the new intake pipe inside the bonnet
Unbox the different parts of the intake and slide the air filter into the air tube. Secure it to the tube with a hose clamp.
-
Step 9: Secure the bottom part of the pipe to the car with a nut
Use another nut to secure the bottom part of the pipe to the car. This is to make sure it stays in place and doesn’t interfere with other parts of your car.
-
Step 10: Reinstall the mass airflow sensor back up to the intake part
At this point, it’s time to reinstall the mass airflow sensor that we put aside. When doing this, make sure you install it properly.
Be sure the arrow points toward the intake manifold in the airflow direction.
-
Step 11: Secure the attachment with a hose clamp
Tighten it using a hose clamp, and make sure that it’s fully secure before moving on to the next step.
-
Step 12: Activate the airflow sensor
Turn the airflow sensor back on, so that it is working.
-
Step 13: Install the cone filter
Under the cold air intake, install the cone filter. This filter increases performance and allows the engine to get more air.
-
Step 14: Secure the intake with a hose clamp
Tighten the intake up to the pipe using a hose clamp. Once again, you want to make sure that all of these parts that you are installing are done properly and securely, so you don’t have a future problem on your hands.
-
Step 15: Install the battery back onto the car
Reconnect the car battery to the car
-
Step 16: Turn the car on to see how the air intake sounds
Optimally, you should notice an “intake noise” and the car should sound different from the way it did before.
If you find abnormalities like a weird engine noise, reduced gas mileage or an overheating engine, then something might have gone wrong.
In that case, review the entire process to find out any mistakes you made that could be the cause of the anomaly.
Don’t turn the car back on until you double check if all the sensors, clamps, and the new air intake are correctly installed.
-
Step 17: Test-driving
You can learn the different air volumes by letting the car idle for a few minutes. When you’re ready, take it for a test drive!
If you notice anything wrong, go through the steps again. If you still can’t figure out a solution, though, then pay your local mechanic a visit.
Cold Air Intake Installation Tips
-
Unplug your battery before installation
Like we mentioned earlier, it’s important to unplug your car battery before working with anything in your car that is voltage sensitive.
This is because your car battery can generate a lot of current, and though it’s not enough to shock you, the car can start a fire or melt important car components.
-
Stable your car properly
Make sure that your car is stable and on level ground. You never want to work on an unstable car, even if it is lifted, as the car could topple over.
Best case scenario, your car gets some damage, worst case, you get crushed. So, to avoid this, please make sure your car is level.
-
Knowing your vehicle specification
Check your vehicle specifications before buying any new parts. Different cars require different types of intakes and if you don’t get the right one, then it won’t work and you’ll have wasted your money.
Make sure you know exactly what kind of air intake system to buy for your car.
-
Let your vehicle cool down
To avoid getting burns, make sure your car is cool before you work on it and not just fresh from a drive. While you’re waiting, you can go through all the steps and look through your car manual.
FAQs
1. Do I need an oiled or dry cold air intake system?
Ans. As a good rule of thumb, it’s generally safe to use whatever filter you cold air intake came with. If it came with a dry filter, then skip the oil and if the filter is oiled, then keep it oiled following the manufacturer’s instructions.
2. Can I just clean my dry filter?
Ans. Yes, if you have a filter that came dry and works fine like that, then it’s safe to just clean it and skip on the oil.
3. How much horsepower will I gain from a cold air intake?
Ans. With a cold air intake, you should notice a 10-15 horsepower increase.


Leave a Comment